# FreeScout

FreeScout is a lightweight yet powerful help desk and shared inbox. We will use it to replace the HubSpot Help Desk feature.  
[https://freescout.cbtscommons.org](https://freescout.cbtscommons.org)

# Freescout Intro Video

<iframe allowfullscreen="allowfullscreen" height="486" src="https://player.vimeo.com/video/1190612738?title=0&byline=0&portrait=0&color=8dc7dc" style="width: 850px; height: 486px;" width="850"></iframe>

# Viewing Your Tickets

1. From the FreeScout home page, find the mailbox that you want to view (you may only have one mailbox). In that mailbox card, click "Mine".  
    [![image.png](https://bookstack.cbtscommons.org/uploads/images/gallery/2026-05/scaled-1680-/eZmxeXG1SlO97swc-zPdimage.png)](https://bookstack.cbtscommons.org/uploads/images/gallery/2026-05/eZmxeXG1SlO97swc-zPdimage.png)
2. You will see a list of your tickets with unread tickets at the top and all ticket sorted (by default) by most recent activity.  
    [![image.png](https://bookstack.cbtscommons.org/uploads/images/gallery/2026-05/scaled-1680-/DO33NfpMQqF0JHsW-cAwimage.png)](https://bookstack.cbtscommons.org/uploads/images/gallery/2026-05/DO33NfpMQqF0JHsW-cAwimage.png)
3. Click on a ticket to open it.
4. The ticket will open and you will be presented with the ticket view.  
    [![image.png](https://bookstack.cbtscommons.org/uploads/images/gallery/2026-05/scaled-1680-/0di1BBka4fcsPWmH-031image.png)](https://bookstack.cbtscommons.org/uploads/images/gallery/2026-05/0di1BBka4fcsPWmH-031image.png)

# Replying to a ticket

1. Once [in the ticket view](https://bookstack.cbtscommons.org/books/freescout/page/viewing-your-tickets "Viewing Your Tickets"), click the arrow on the top left of the ticket window area.  
    [![image.png](https://bookstack.cbtscommons.org/uploads/images/gallery/2026-05/scaled-1680-/Uw0QEwOuqiqFK8C1-YI9image.png)](https://bookstack.cbtscommons.org/uploads/images/gallery/2026-05/Uw0QEwOuqiqFK8C1-YI9image.png)
2. A reply section will open. Type your reply here, then click "Send Reply". [![image.png](https://bookstack.cbtscommons.org/uploads/images/gallery/2026-05/scaled-1680-/iolHX545RdFnijgc-zj1image.png)](https://bookstack.cbtscommons.org/uploads/images/gallery/2026-05/iolHX545RdFnijgc-zj1image.png)
3. Your reply is sent.

# Merging Tickets

<p class="callout info">The ticket you have open when you start the merge will retain its ticket number. The other ticket will be merged into the open ticket.</p>

1. Note the ticket number of the ticket that needs to be merged (this can be found on the right side of the ticket list screen or of an individual ticket).  
    [![image.png](https://bookstack.cbtscommons.org/uploads/images/gallery/2026-05/scaled-1680-/z1zpamu8rRia205e-LT2image.png)](https://bookstack.cbtscommons.org/uploads/images/gallery/2026-05/z1zpamu8rRia205e-LT2image.png)
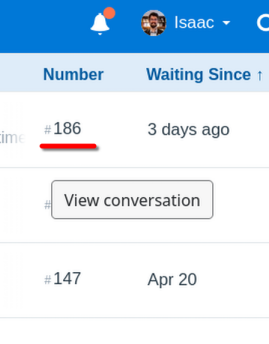
2. "View"/Open the ticket you wish to start the merge from.
3. Under the "More Actions" button, select "Merge".  
    [![image.png](https://bookstack.cbtscommons.org/uploads/images/gallery/2026-04/scaled-1680-/9yhimage.png)](https://bookstack.cbtscommons.org/uploads/images/gallery/2026-04/9yhimage.png)
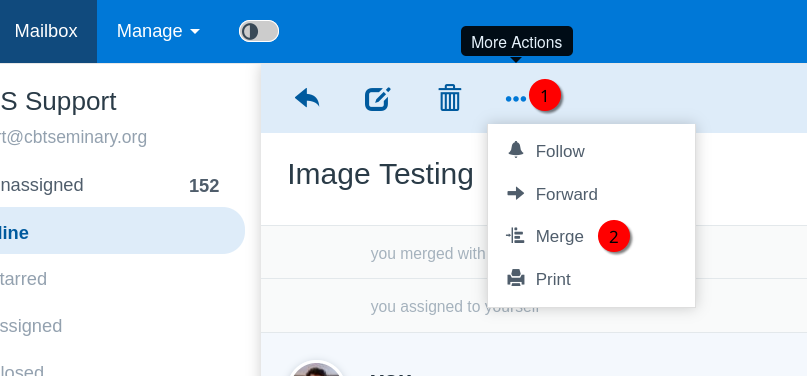
4. Input the ticket number from step 1 into the search box and select "Search". Select the checkbox of the correct ticket in the list.
5. Select "Merge".

# Restore a Deleted Ticket

Deleted tickets in FreeScout are placed in the Deleted folder. Tickets in the Deleted folder can be restored.

1. If you haven't already, enter the specific mailbox the deleted ticket is in. (We currently only have the Support mailbox.)
2. You will initially be on the "Unassigned" tickets folder. Open the "Closed" tickets folder.  
    [![image.png](https://bookstack.cbtscommons.org/uploads/images/gallery/2026-04/scaled-1680-/rB5image.png)](https://bookstack.cbtscommons.org/uploads/images/gallery/2026-04/rB5image.png)
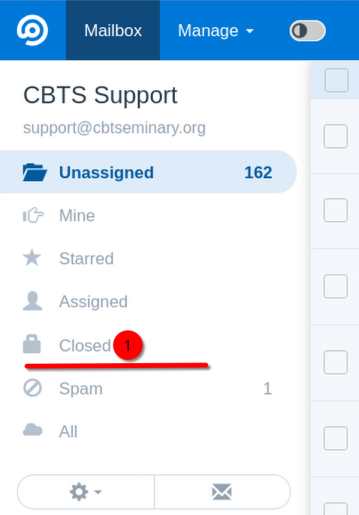
3. The "Deleted" folder will appear as a sub-folder to "Deleted". Open the "Deleted" folder.  
    [![image.png](https://bookstack.cbtscommons.org/uploads/images/gallery/2026-04/scaled-1680-/N9qimage.png)](https://bookstack.cbtscommons.org/uploads/images/gallery/2026-04/N9qimage.png)
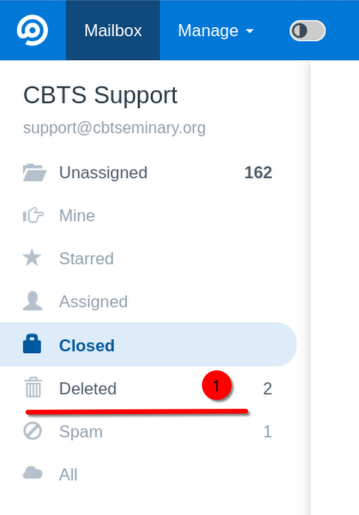
4. Select/open the deleted ticket you want to restore.
5. On the top right, select the "Deleted" button. Then click "Restore". [![image.png](https://bookstack.cbtscommons.org/uploads/images/gallery/2026-04/scaled-1680-/PAUimage.png)](https://bookstack.cbtscommons.org/uploads/images/gallery/2026-04/PAUimage.png)
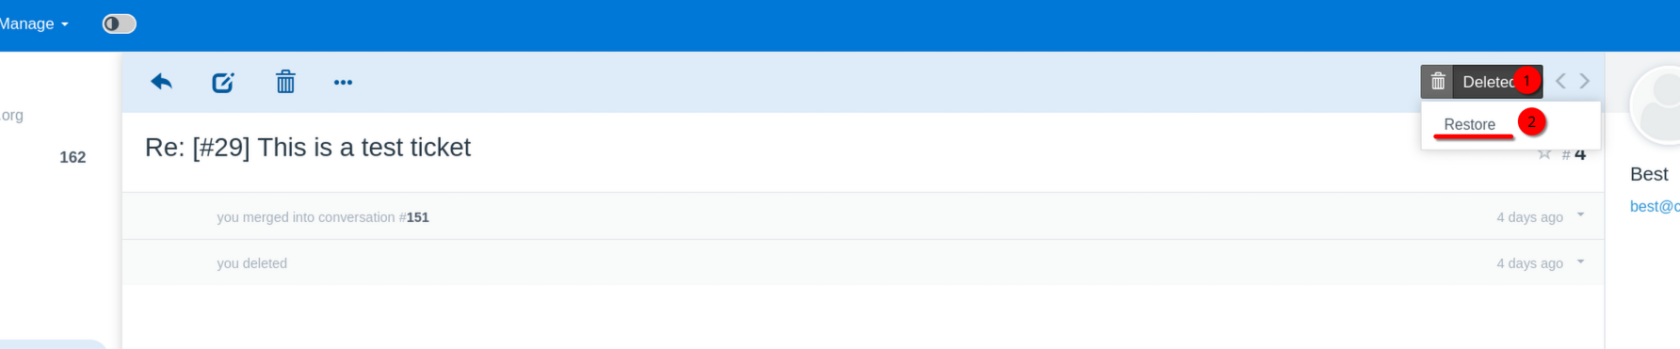
6. The ticket has been restored to the folder &amp; assignment it had when it was deleted.

# Change Ticket "Customer"

<p class="callout info">This is also what you should do if you want to send an email from the ticket to someone other than the "customer". Just remember that Freescout sends the last message as an email reply in addition to your newest message.</p>

1. Open the ticket in Freescout.
2. On the far right, look for the gear icon next to the ticket "customer" name. Click it.  
    [![image.png](https://bookstack.cbtscommons.org/uploads/images/gallery/2026-05/scaled-1680-/4F2lCuaB0L96RDGD-gIKimage.png)](https://bookstack.cbtscommons.org/uploads/images/gallery/2026-05/4F2lCuaB0L96RDGD-gIKimage.png)
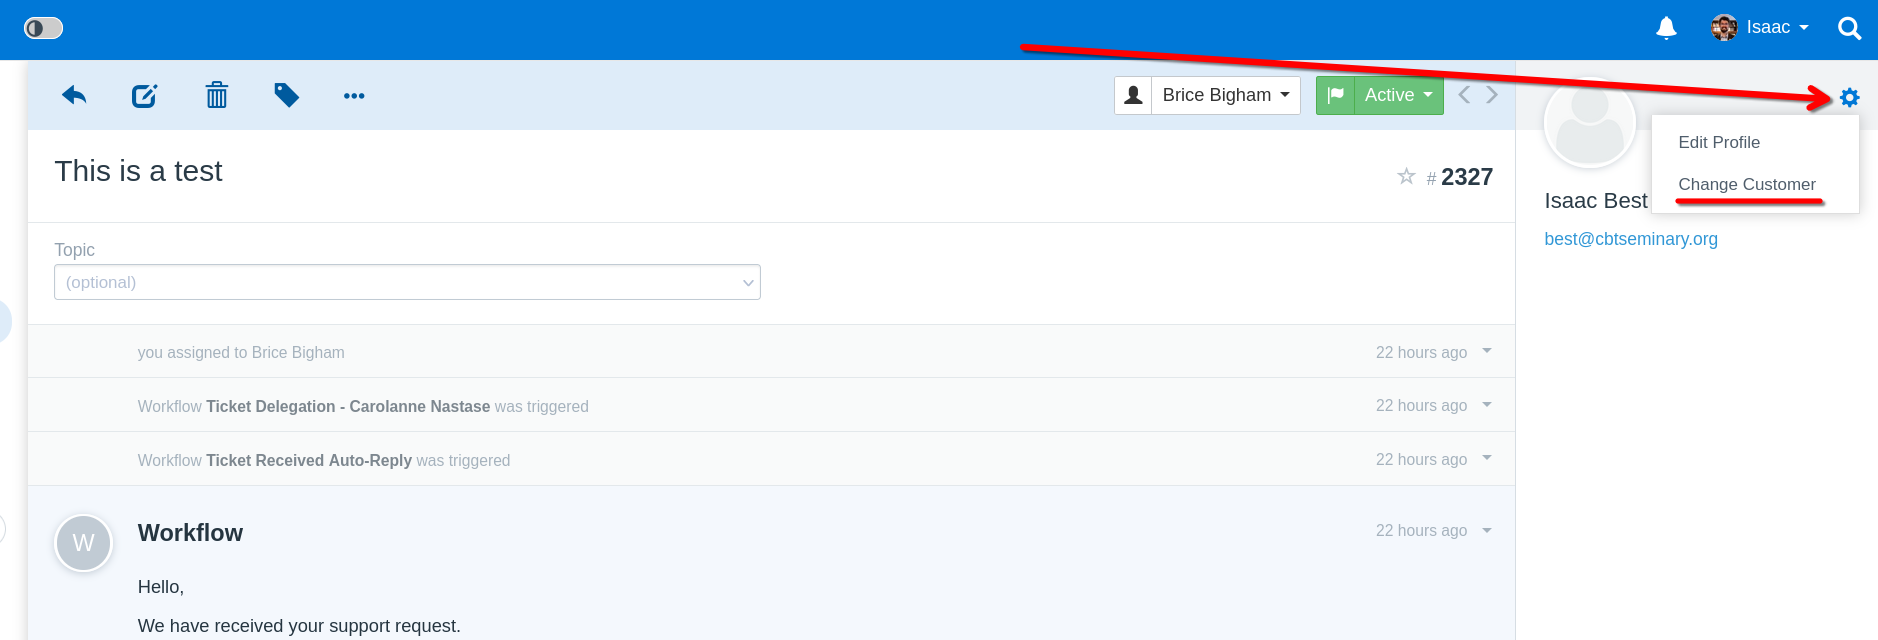
3. Select "Change Customer" in the drop-down menu.
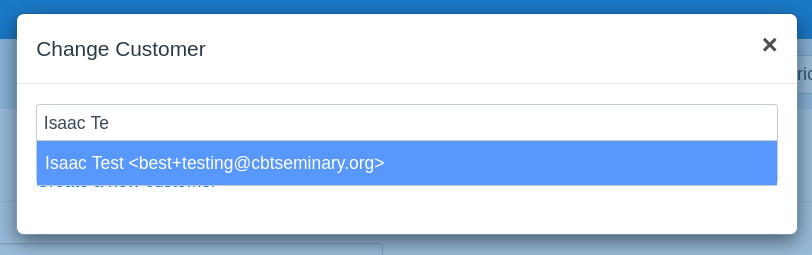
4. In the pop-up, enter the name or email address of the new ticket "customer".
5. **If the "customer already exists in Freescout -**
    
    
    1. If the "customer" already exists in Freescout, select him/her from the drop-down.  
        [![image.png](https://bookstack.cbtscommons.org/uploads/images/gallery/2026-05/scaled-1680-/bWxvpQFAfef3Ya4D-eiNimage.png)](https://bookstack.cbtscommons.org/uploads/images/gallery/2026-05/bWxvpQFAfef3Ya4D-eiNimage.png)
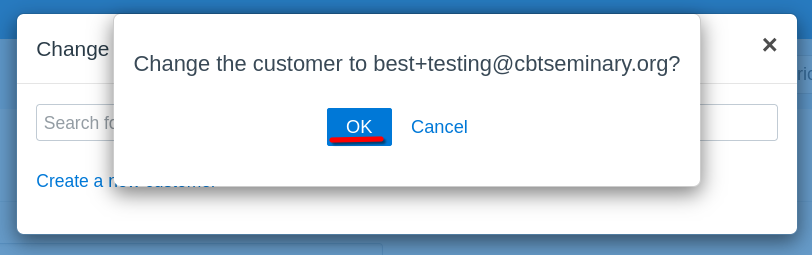
    2. Then select "OK" to confirm.  
        [![image.png](https://bookstack.cbtscommons.org/uploads/images/gallery/2026-05/scaled-1680-/uUpE85I43nRps84u-4MLimage.png)](https://bookstack.cbtscommons.org/uploads/images/gallery/2026-05/uUpE85I43nRps84u-4MLimage.png)
    3. <p class="callout success">You have successfully changed the ticket "customer".</p>
6. **If the "customer" does not exist in Freescout -** 
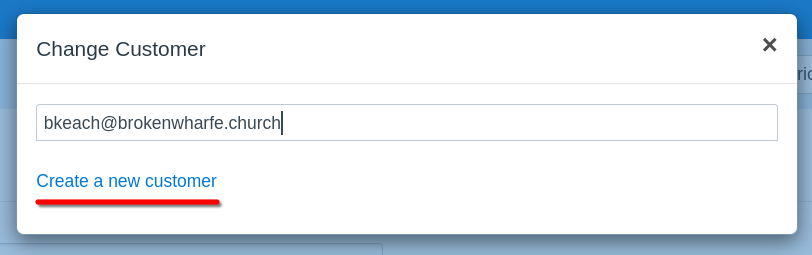
    1. If the "customer" does not exist in Freescout, select "Create a new customer". [![image.png](https://bookstack.cbtscommons.org/uploads/images/gallery/2026-05/scaled-1680-/YijR5AJi4WfXAuqV-bv4image.png)](https://bookstack.cbtscommons.org/uploads/images/gallery/2026-05/YijR5AJi4WfXAuqV-bv4image.png)
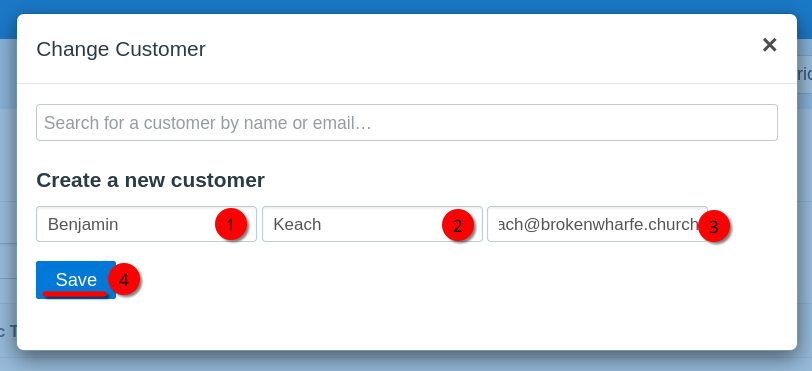
    2. A new section will appear. Enter the "customer" name and email address, then select "Save".  
        [![image.png](https://bookstack.cbtscommons.org/uploads/images/gallery/2026-05/scaled-1680-/ZaN342elg1kBQHeU-ukhimage.png)](https://bookstack.cbtscommons.org/uploads/images/gallery/2026-05/ZaN342elg1kBQHeU-ukhimage.png)
    3. <p class="callout success">You have successfully changed the ticket "customer".</p>