Jitsi
Jitsi is a many-featured, browser-based video conferencing tool.
Jitsi Basics (getting started)
Getting started
Jitsi uses a different model for use than does Zoom. All you need to use Jitsi is a browser and your CBTSCommons account.
Scheduling a meeting
Jitsi does not have a scheduling component of its own. This is left to other services to provide; we integrate with Calcom for scheduled meeting needs. Therefore, we need to be more precise in what we mean. This section discusses how to prepare a meeting link that can be sent out to one or several individuals. Jitsi does not require any predetermined time to be configured for a meeting.
Basic method
- Come up with a unique meeting name. For our example, we will use "General Assembly In London".
- Add your meeting name (without any spaces) at the end of our Jitsi link - https://jitsi.cbtscommons.org/[your meeting name here]
https://jitsi.cbtscommons.org/GeneralAssemblyInLondon - Send that link to your meeting attendees.
Longer method
- Open Jitsi - https://jitsi.cbtscommons.org.
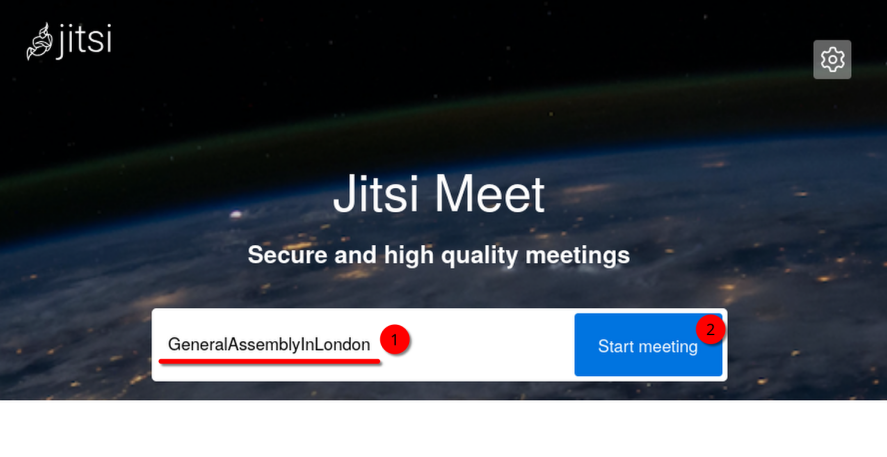
- Type a unique meeting name into the text box. Then click "Start Meeting".

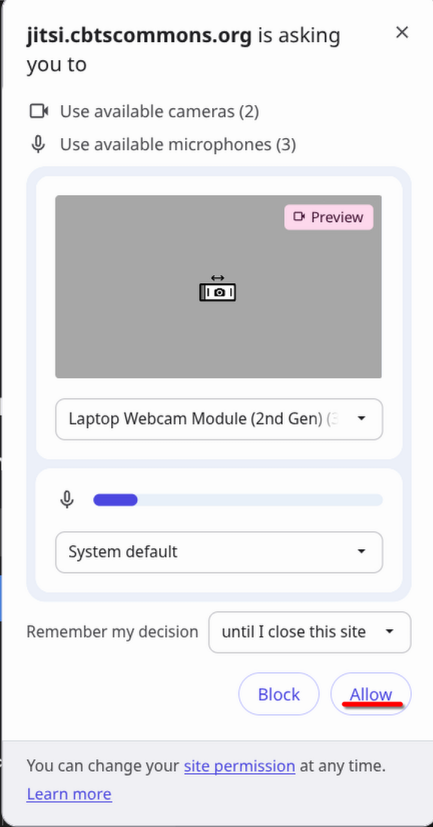
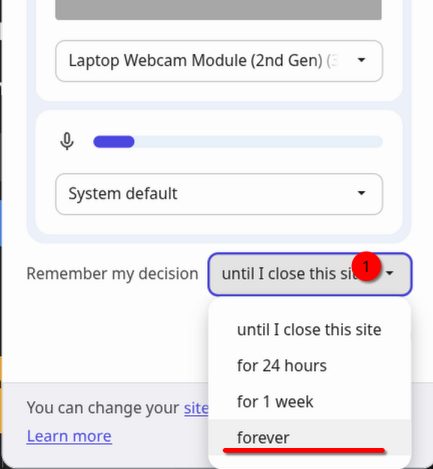
- Select "Allow" on the permissions pop-up.

You may want to change the time for your browser to remember this permission. This will prevent you from being asked for camera & microphone permissions every time you join a Jitsi Meeting.

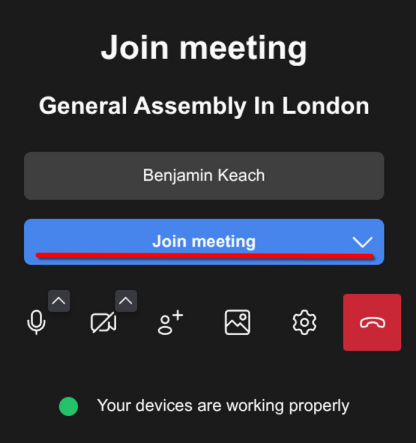
- Select "Join Meeting" on the left sidebar.

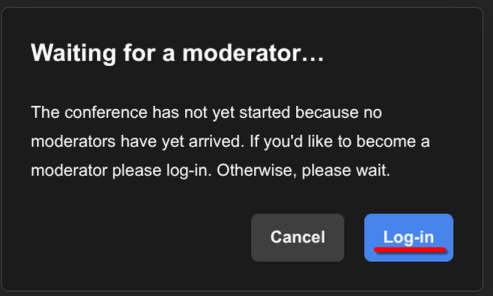
- If you are asked to Log in, do so.
- Select "Log-in"

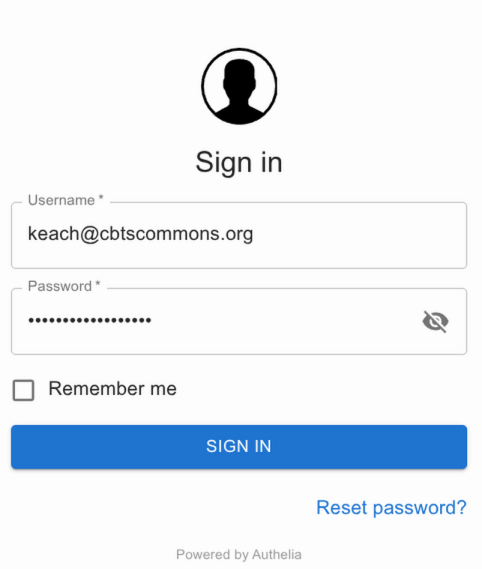
- If prompted, sign in using your CBTSCommons credentials.

- Select "Log-in"
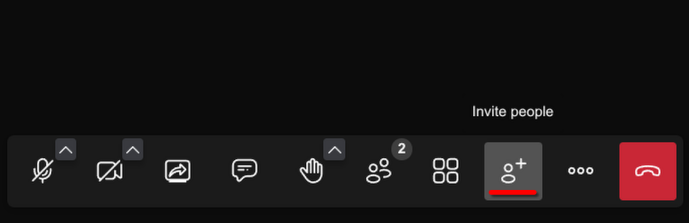
- Select the "Invite people" button on the bottom bar.

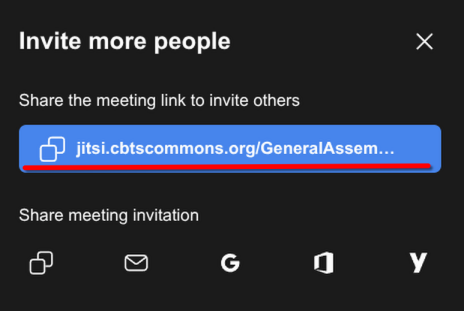
- Click the blue copy button to copy the meeting link. (Alternately, use email icon buttons to open your email with a pre-populated meeting link.)

- You now have a Jitsi meeting link in your clipboard. You may close/leave the Jitsi meeting.
Recording a Meeting
Should you need to record a meeting, Jitsi offers an option to do so.
Recording is only available in supported browsers.
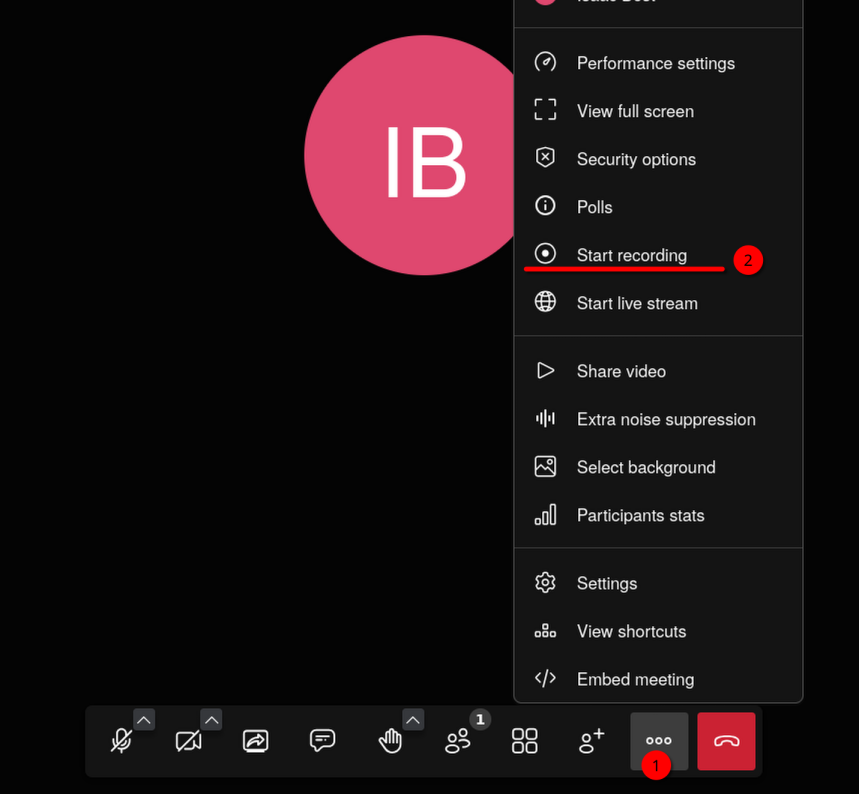
- Once logged in to the meeting, click the three dots button on the bottom bar.

- Then select "Start recording".
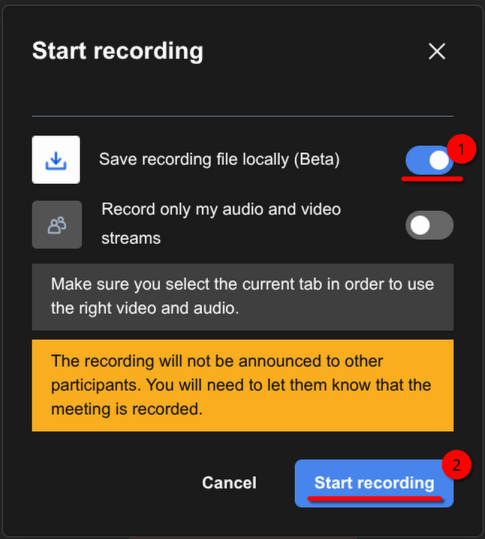
- A recording options pop-up will open. Select the "Save recording file locally" option, then click "Start recording".

If you do not see the "Save recording file locally" option, see the Recording Limitations article.
- You will be asked where to save the meeting recording. Select a location and file name.
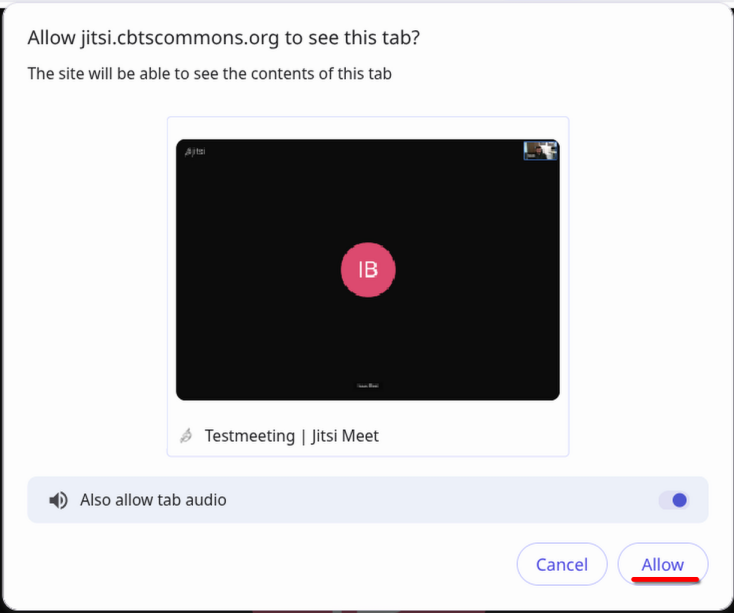
- A pop-up will ask your permission to "Allow jitsi.cbtscommons.org to see this tab?"; select allow.

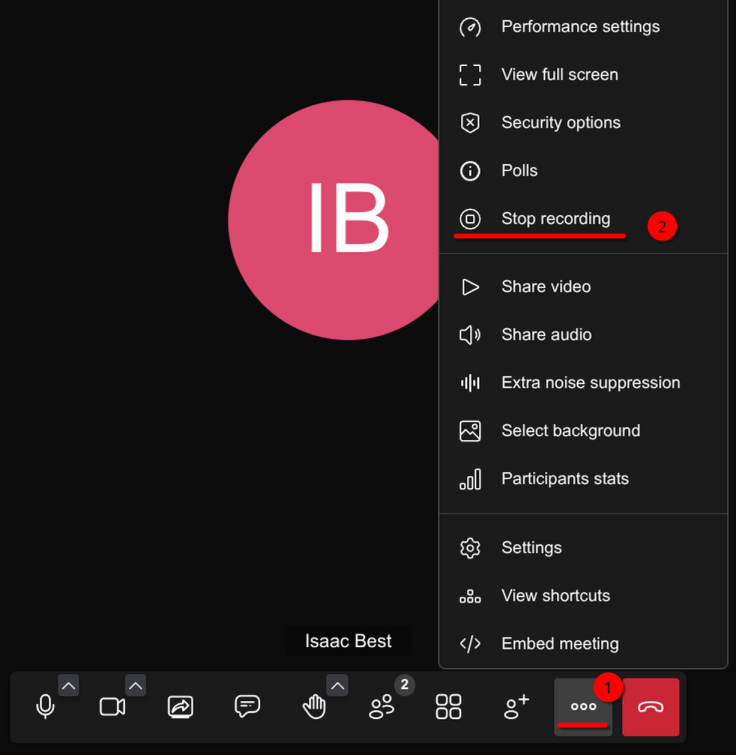
- The recording will start. Once your meeting is done, before you exit the meeting, select the same three dots button on the bottom bar and then click "Stop recording".

- Your recording will be saved to the file & location selected in step 4.
Recording Limitations
Only local recording is supported
Currently, only the local recording option is available in Jitsi. The "default" recording option is non-functional.
Supported browsers
The local recording option is only available in Chrome-based browsers. If you are using Safari, Firefox, or a Firefox based browser, the option will not be visible.
Recording using Brave
If you are using Brave, a browser setting must be enabled before the local recording option is available.
- Open a new tab and navigate to brave://flags.
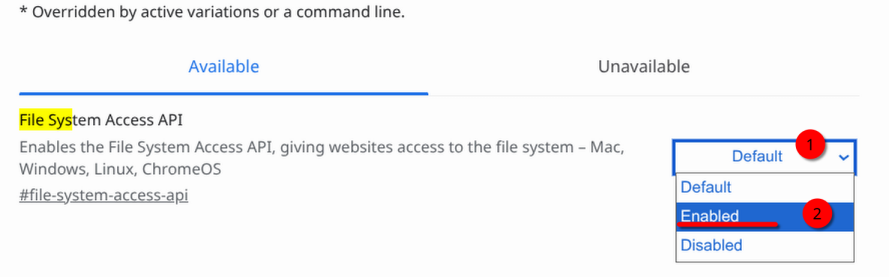
- Search for
File System Access API - Change the setting to "Enabled".

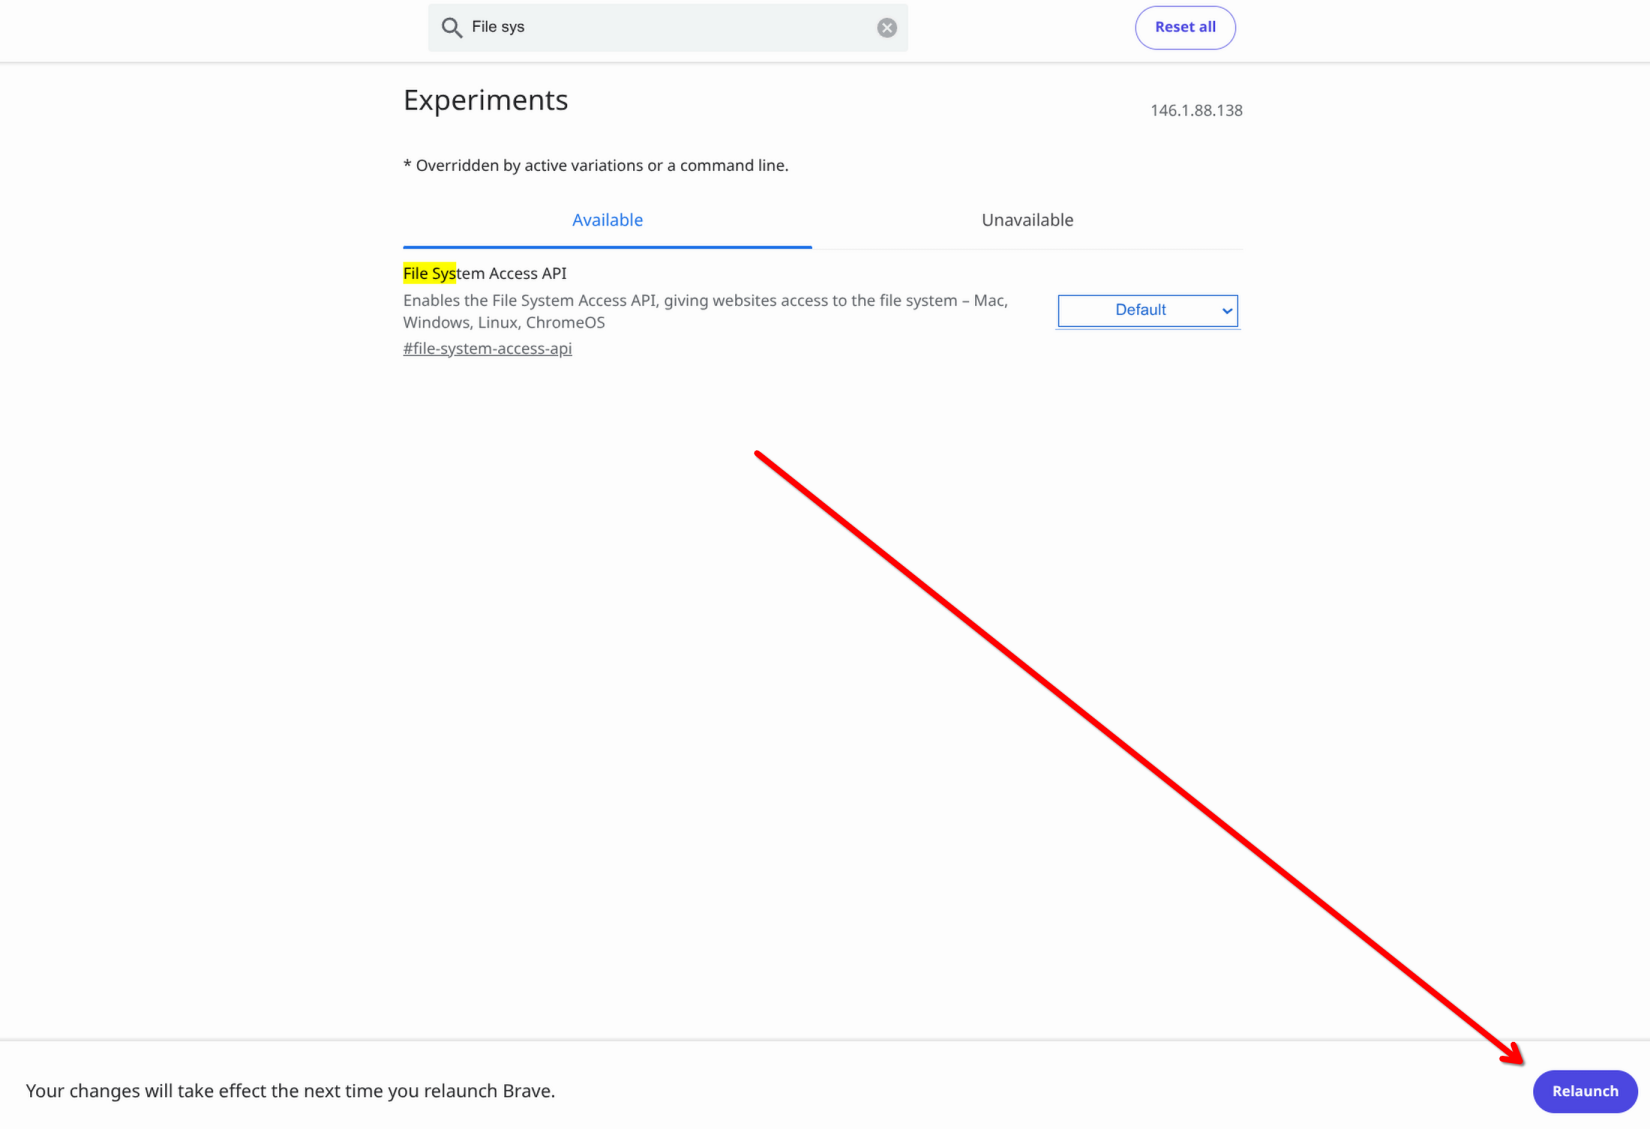
- Select "Relaunch" at the bottom right.

- Brave will restart. Go to your Jitsi meeting and you will now have access to the local recording option.