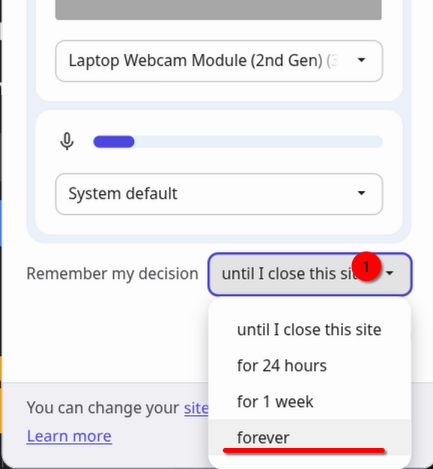
You may want to change the time for your browser to remember this permission. This will prevent you from being asked for camera & microphone permissions every time you join a Jitsi Meeting.
[](https://bookstack.cbtscommons.org/uploads/images/gallery/2026-04/vG2image.png) 4. Select "Join Meeting" on the left sidebar. [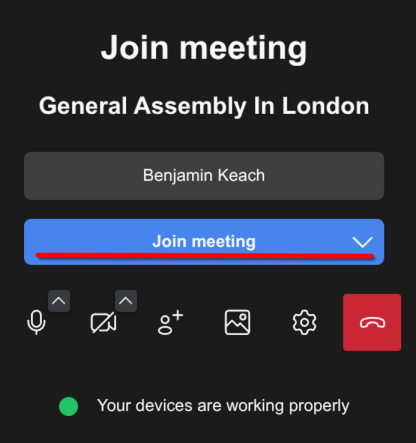](https://bookstack.cbtscommons.org/uploads/images/gallery/2026-04/eN5image.png) 5. If you are asked to Log in, do so. 1. Select "Log-in" [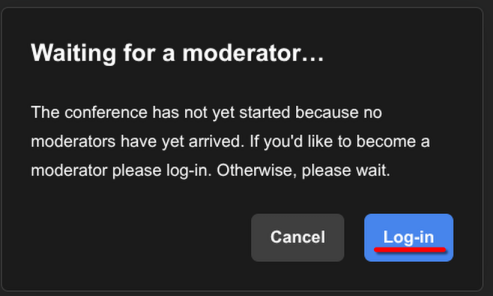](https://bookstack.cbtscommons.org/uploads/images/gallery/2026-04/unLimage.png) 2. If prompted, sign in using your CBTSCommons credentials. [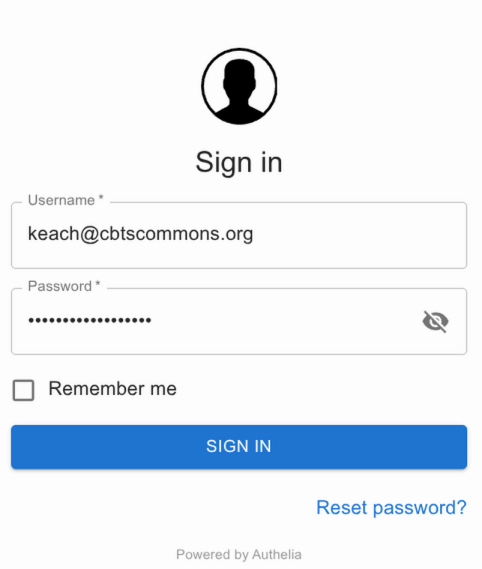](https://bookstack.cbtscommons.org/uploads/images/gallery/2026-04/rZNimage.png) 6. Select the "Invite people" button on the bottom bar. [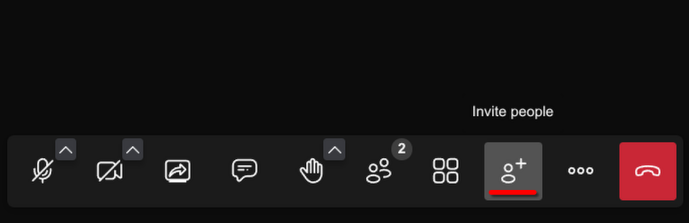](https://bookstack.cbtscommons.org/uploads/images/gallery/2026-04/TESimage.png) 7. Click the blue copy button to copy the meeting link. (Alternately, use email icon buttons to open your email with a pre-populated meeting link.) [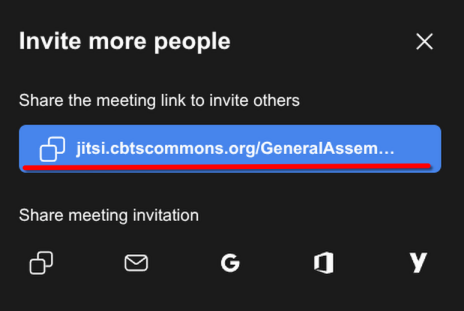](https://bookstack.cbtscommons.org/uploads/images/gallery/2026-04/Cnhimage.png) 8. You now have a Jitsi meeting link in your clipboard. You may close/leave the Jitsi meeting.Recording is [only available in supported browsers](https://bookstack.cbtscommons.org/books/jitsi/page/recording-limitations "Recording Limitations").
1. Once logged in to the meeting, click the three dots button on the bottom bar. [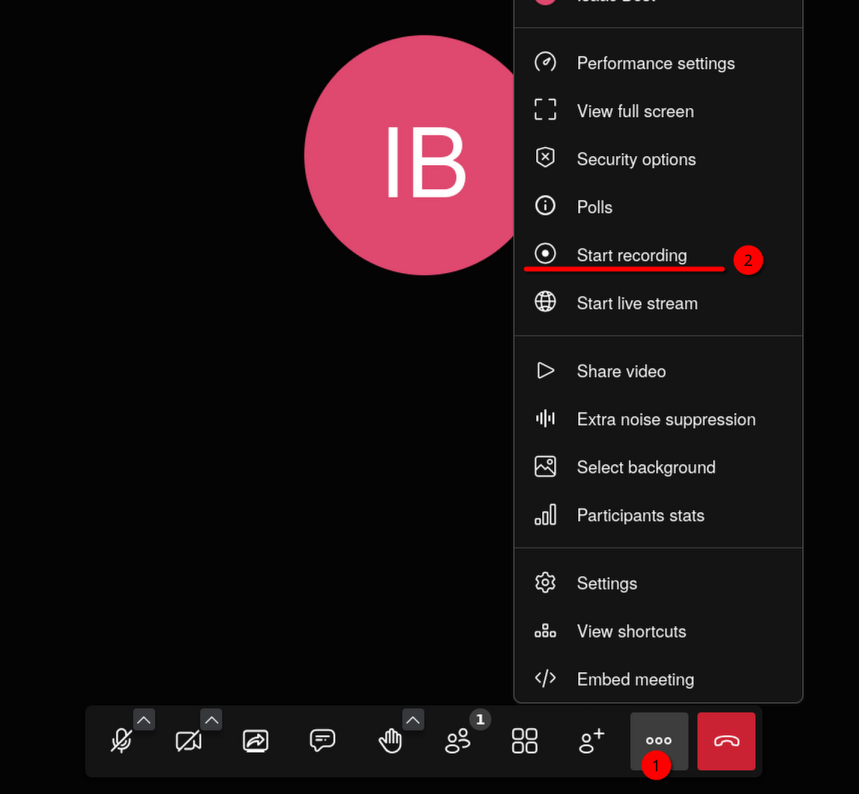](https://bookstack.cbtscommons.org/uploads/images/gallery/2026-04/a5cimage.png) 2. Then select "Start recording". 3. A recording options pop-up will open. Select the "Save recording file locally" option, then click "Start recording". [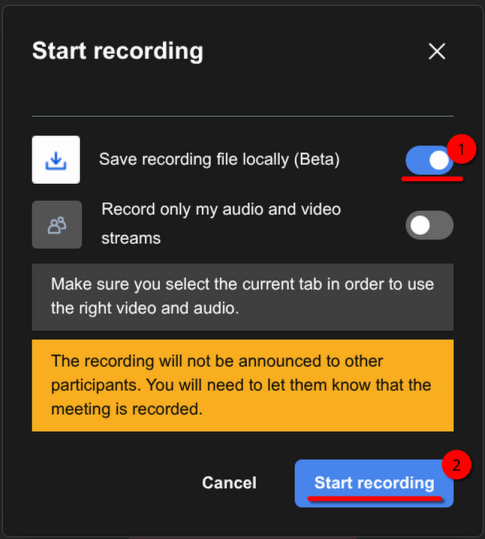](https://bookstack.cbtscommons.org/uploads/images/gallery/2026-04/Byximage.png)If you do not see the "Save recording file locally" option, see the [Recording Limitations article](https://bookstack.cbtscommons.org/books/jitsi/page/recording-limitations "Recording Limitations").
4. You will be asked where to save the meeting recording. Select a location and file name. 5. A pop-up will ask your permission to "Allow jitsi.cbtscommons.org to see this tab?"; select allow. [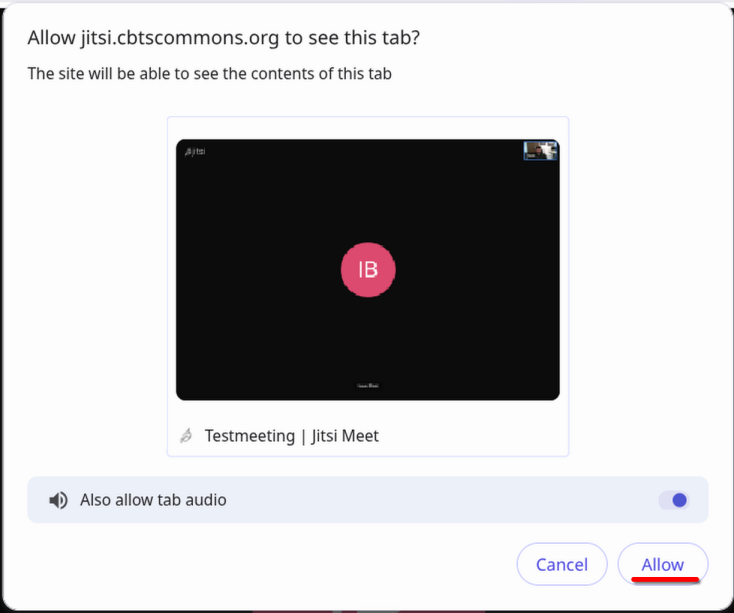](https://bookstack.cbtscommons.org/uploads/images/gallery/2026-04/Bifimage.png) 6. The recording will start. Once your meeting is done, before you exit the meeting, select the same three dots button on the bottom bar and then click "Stop recording". [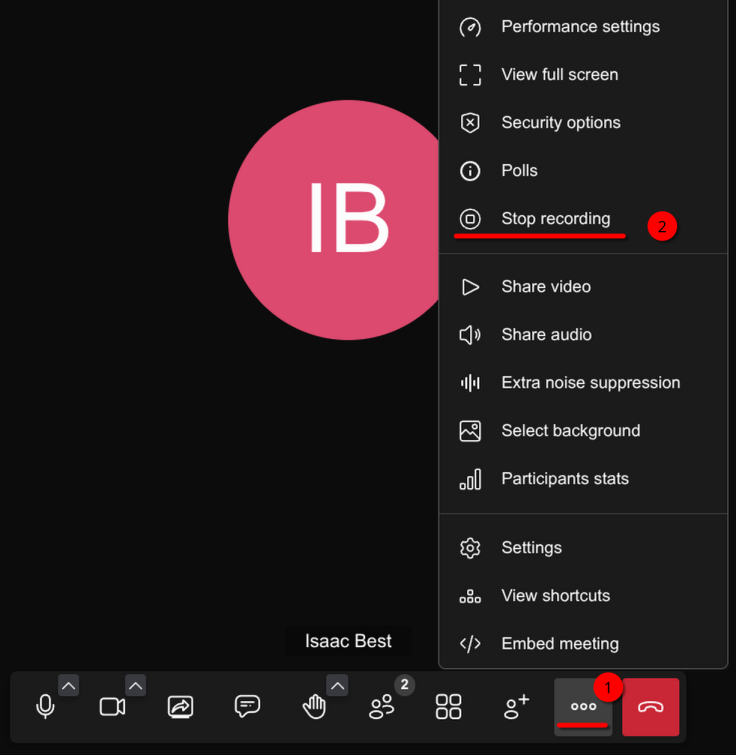](https://bookstack.cbtscommons.org/uploads/images/gallery/2026-04/Yxcimage.png) 7. Your recording will be saved to the file & location selected in step 4. # Recording Limitations ### Only local recording is supported Currently, only the local recording option is available in Jitsi. The "default" recording option is non-functional. ### Supported browsers The local recording option is only available in Chrome-based browsers. If you are using Safari, Firefox, or a Firefox based browser, the option will not be visible. ### Recording using Brave If you are using Brave, a browser setting must be enabled before the local recording option is available. 1. Open a new tab and navigate to [brave://flags](brave://flags). 2. Search for ``` File System Access API ``` 3. Change the setting to "Enabled". [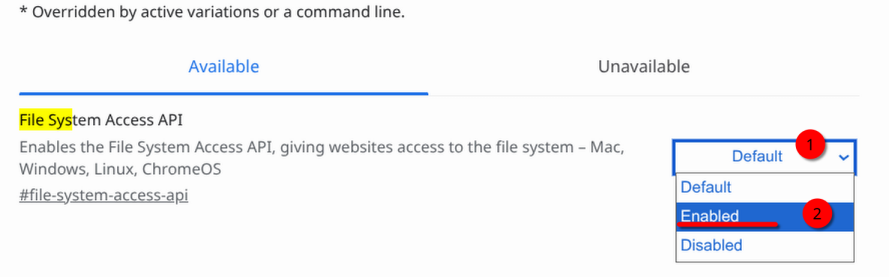](https://bookstack.cbtscommons.org/uploads/images/gallery/2026-04/leWimage.png) 4. Select "Relaunch" at the bottom right. [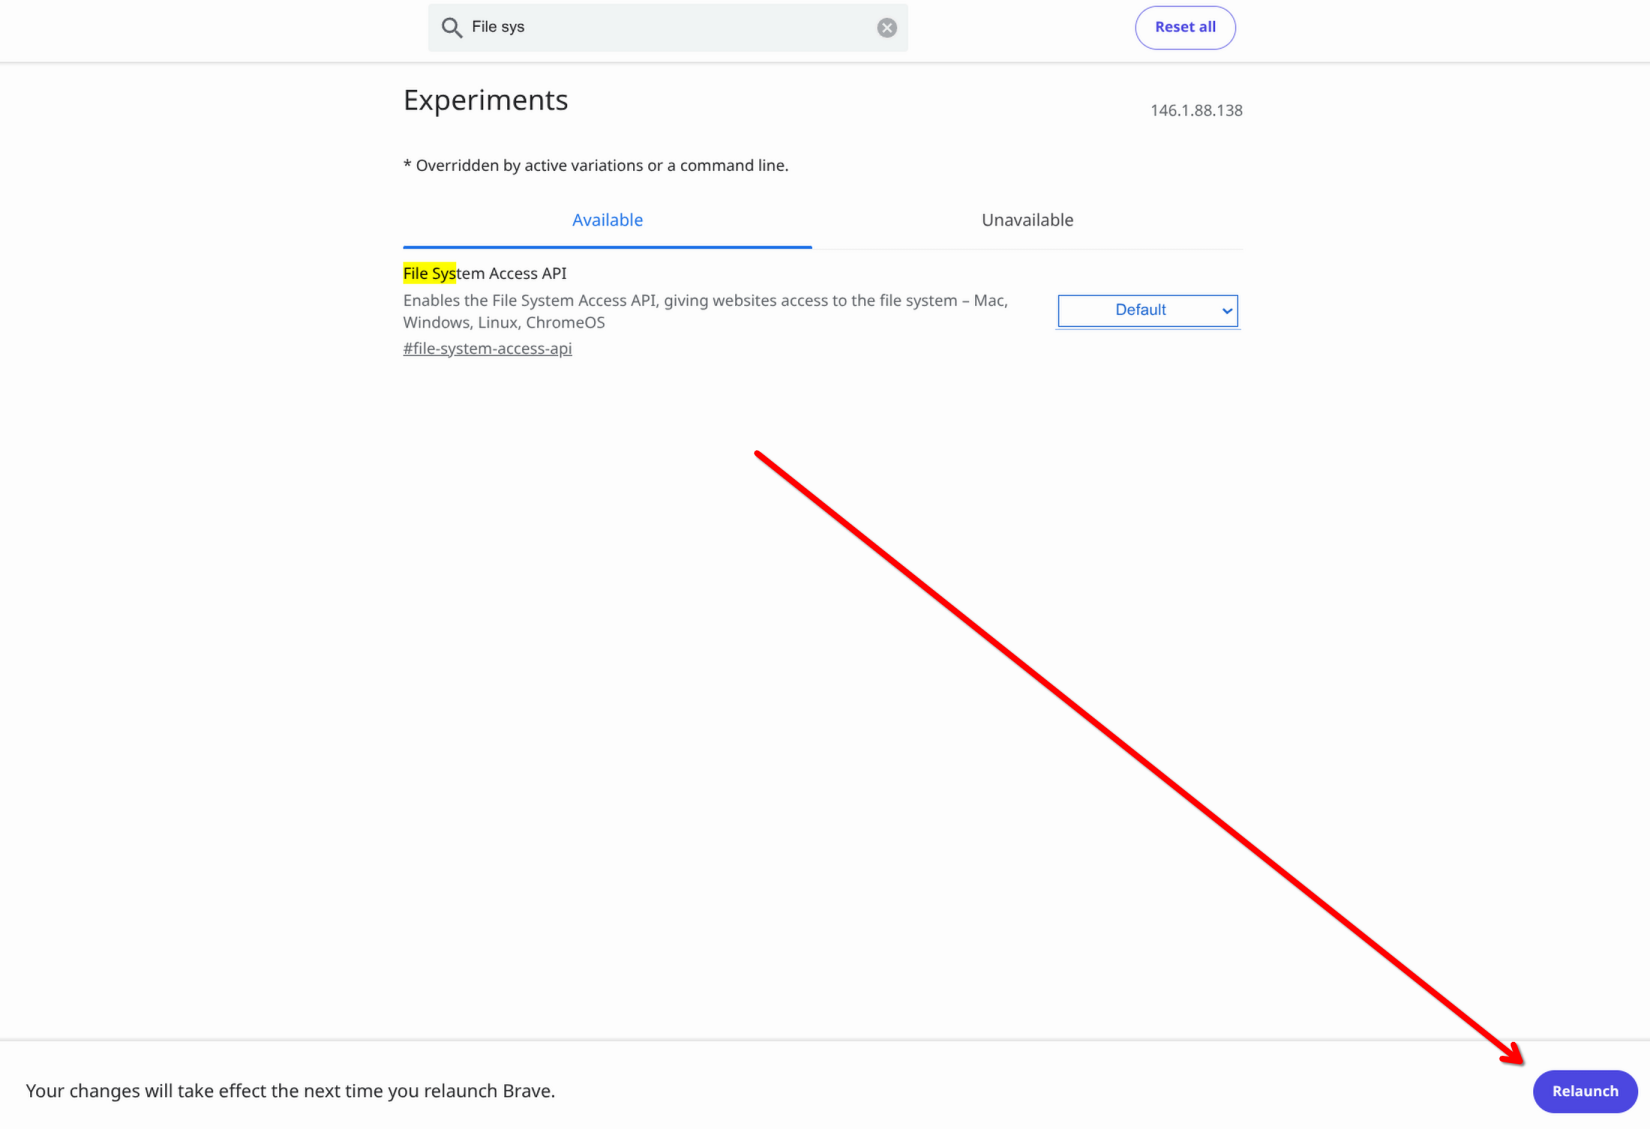](https://bookstack.cbtscommons.org/uploads/images/gallery/2026-04/FNzimage.png) 5. Brave will restart. Go to your Jitsi meeting and you will now have access to the local recording option.