Vaultwarden
Password & authentication code manager for CBTS accounts. Shared accounts are managed through Vaultwarden.
- What is Vaultwarden?
- 1. Creating Your Vaultwarden Account
- 2. Next Steps
- Logging in to the Browser Extension
- Adding 2FA (TOTP/Authenticator) codes to Vaultwarden
- Can't Login on the Bitwarden Extension
What is Vaultwarden?
Vaultwarden is CBTS's internal password manager that allows users to store, manage, and share sensitive information (such as passwords, TOTP keys, passkeys, notes, etc) securely.
We will use it primarily as a password manager for shared accounts/passwords, but also recommend using it for your individual CBTS account logins. It can also be used to securely share files & notes using the Send feature.
Vaultwarden integrates with/uses the Bitwarden suite of apps. Apps are available for Desktop and Mobile users and are available as extensions/add-ons for all major browsers.
1. Creating Your Vaultwarden Account
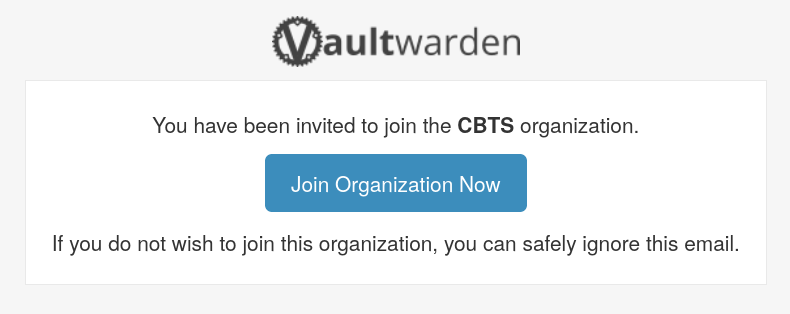
- You will receive an email with an invite to set up your Vaultwarden account. Click "Join Organization Now".

- An account creation page will open. Fill out the password lines and create a helpful password hint. Then click "Create Account".
Note: This password can be different from your CBTSCommons password. We suggest using the same password but it is your choice.
- Your account has been created. You will be offered the Bitwarden browser extension which integrates Vaultwarden with your browser; we recommend installing it.
- If you install the extension, close the tab it opens up.
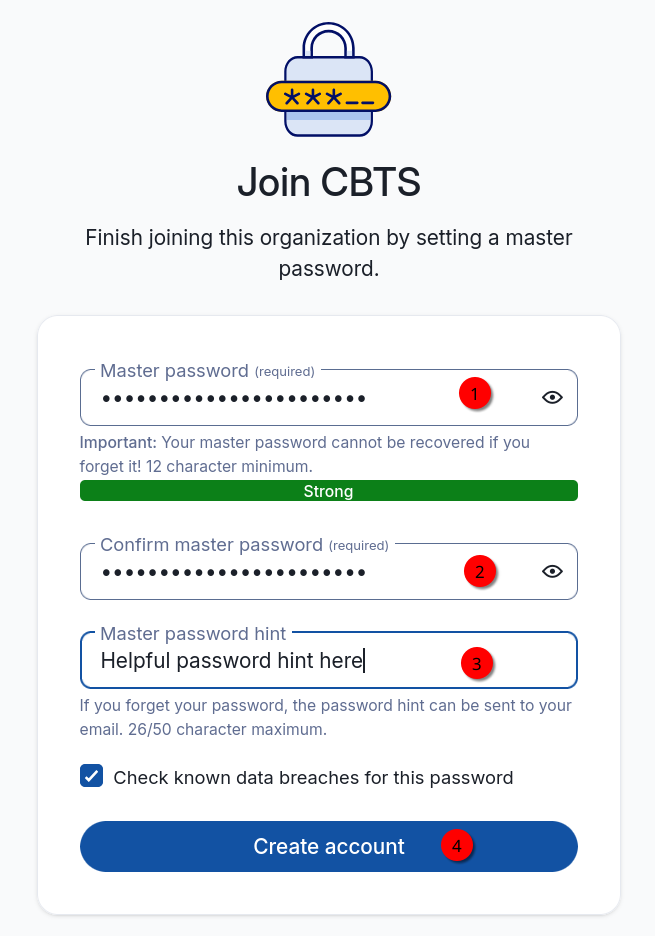
You will not immediately have access to the CBTS shared passwords; please see Next Steps for how to gain access.
2. Next Steps
You will not immediately have access to the CBTS shared passwords; we can only grant accounts access after they have been set up.
-
- After you have created your Vaultwarden account, please email Isaac (best@cbtseminary.org) to let him know you have set up your Vaultwarden account; he will grant you access to the CBTS shared passwords.
- In that email, please include your Vaultwarden account's fingerprint phrase:
- Go to your Vaultwarden Account settings - https://vaultwarden.cbtscommons.org/#/settings/account
- Copy the fingerprint phrase to your email draft

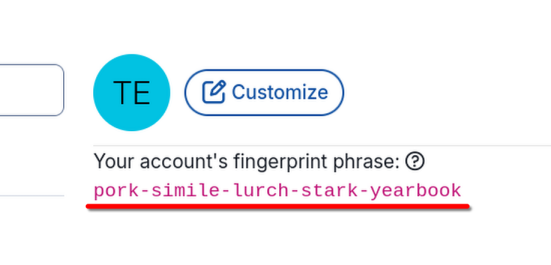
We recommend installing the browser extension for ease of use. The extension setup page will direct you to the correct extension/add-on store to install it. Then, log in to Vaultwarden in the extension.
You may find it useful to install a mobile apps to access Vaultwarden on your phone.
Logging in to the Browser Extension
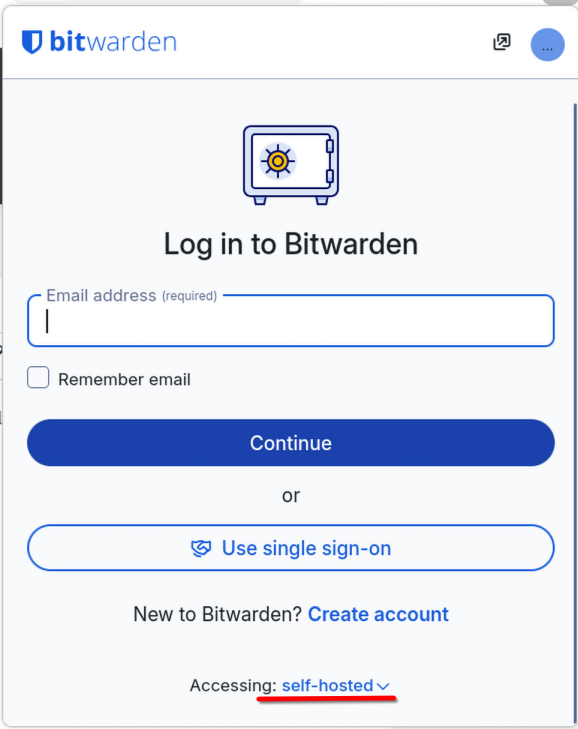
- Click the extension icon in your browser menu/tool bar.

- At the bottom of the extension window, select "Log In".

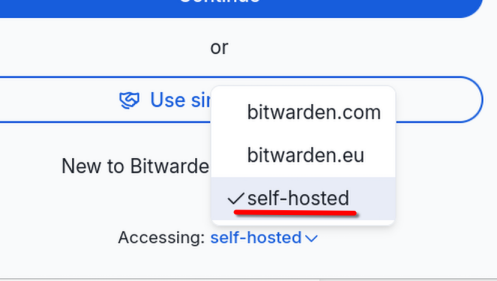
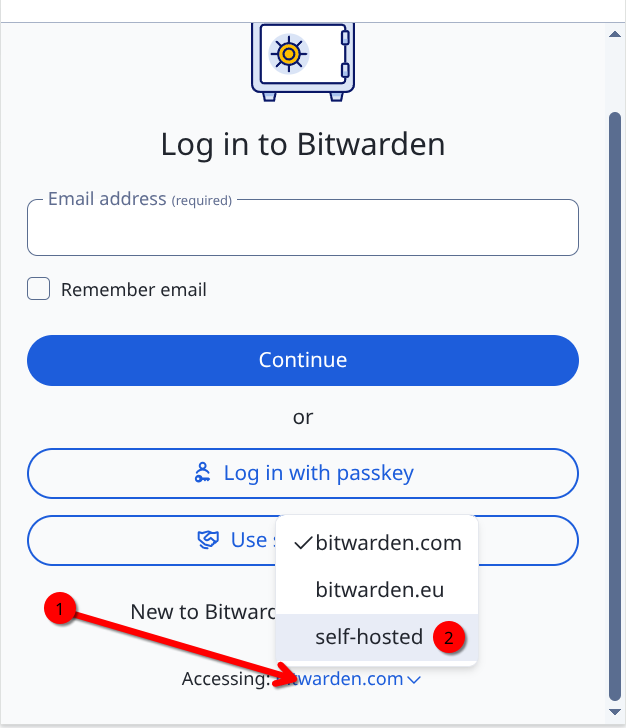
- At the bottom of the next screen (you may need to scroll down), select "Accessing: bitwarden.com", then select "self-hosted".

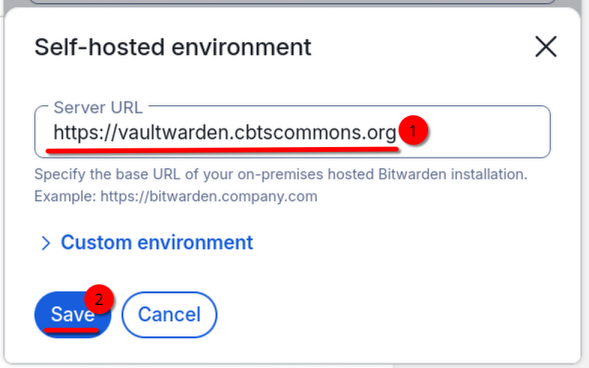
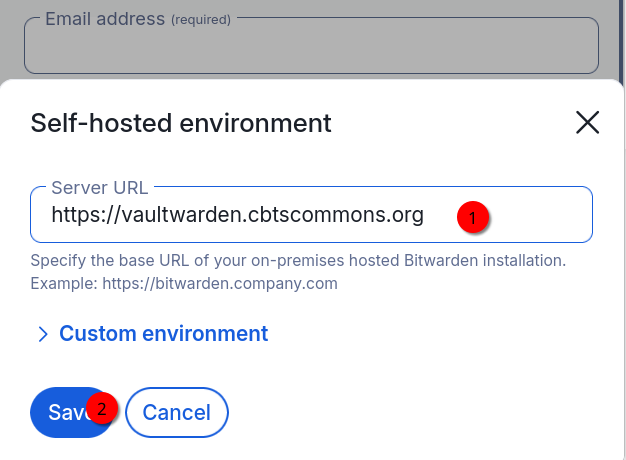
- Fill out the Server URL blank with
then click Save.https://vaultwarden.cbtscommons.org
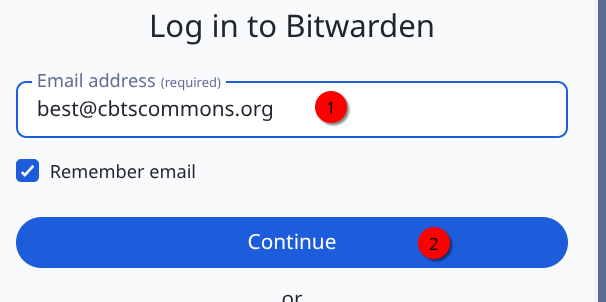
- In the Email Address field, enter your CBTSCommons username/email. Click continue.

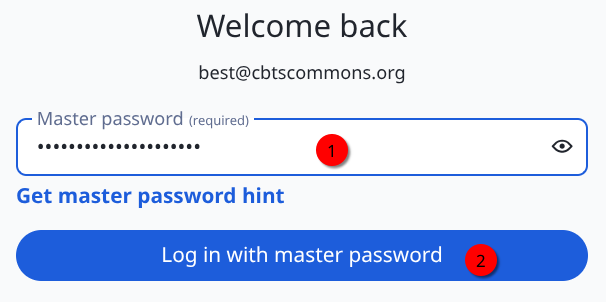
- Enter your Vaultwarden password, then click "Login with master password".

- You are now logged in on the extension.
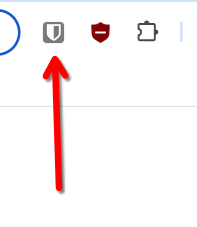
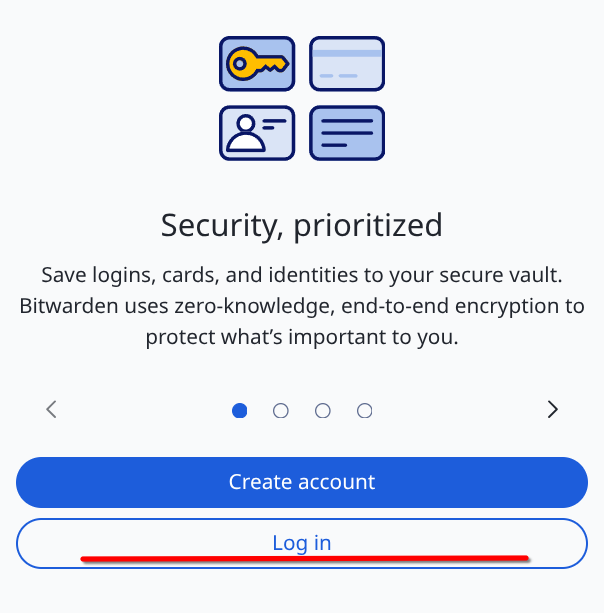
Adding 2FA (TOTP/Authenticator) codes to Vaultwarden
Vaultwarden can be used to generate TOTP/2FA codes in the place of Authenticator apps (such as Google Authenticator/Microsoft Authenticator). This article will walk you through setting up an account to use Vaultwarden for 2FA codes.
Most services that offer 2FA will give you a QR code to scan. We will begin at this step and use a Google Account as an example. The Vaultwarden steps will be the same for most/all accounts.
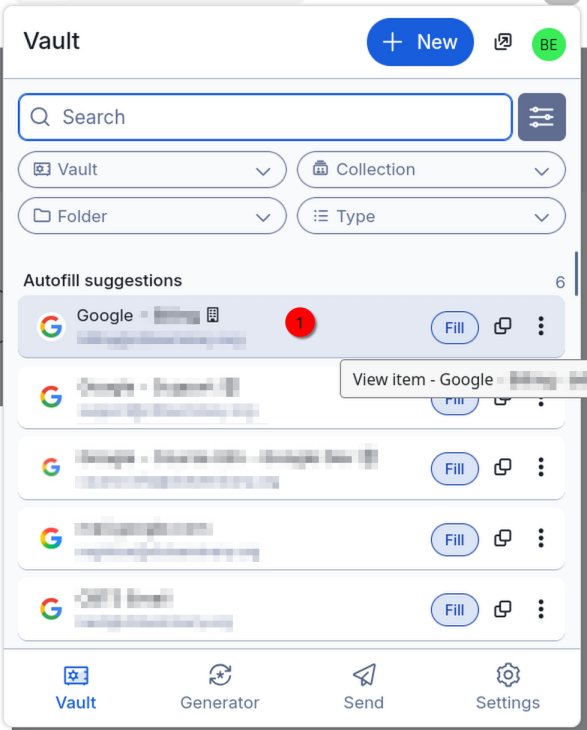
- Once you have a QR code to scan in the browser, click the Bitwarden extension icon.
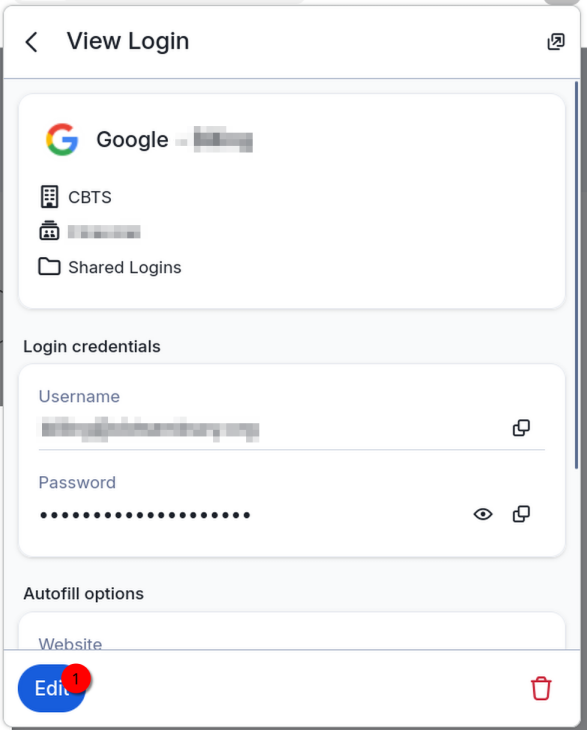
- In the Bitwarden extension window, select the account to which you are adding 2FA. (You can also select "New" and add a login, in which case, skip to step #4.)

- Select "Edit" in the lower left corner.

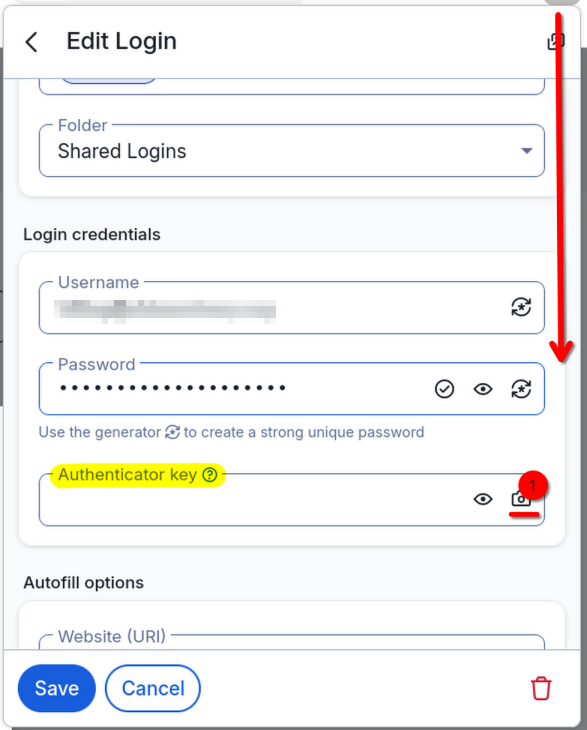
- Scroll down to the section labeled "Login credentials" and find the "Authenticator key" text box. Select the camera icon.

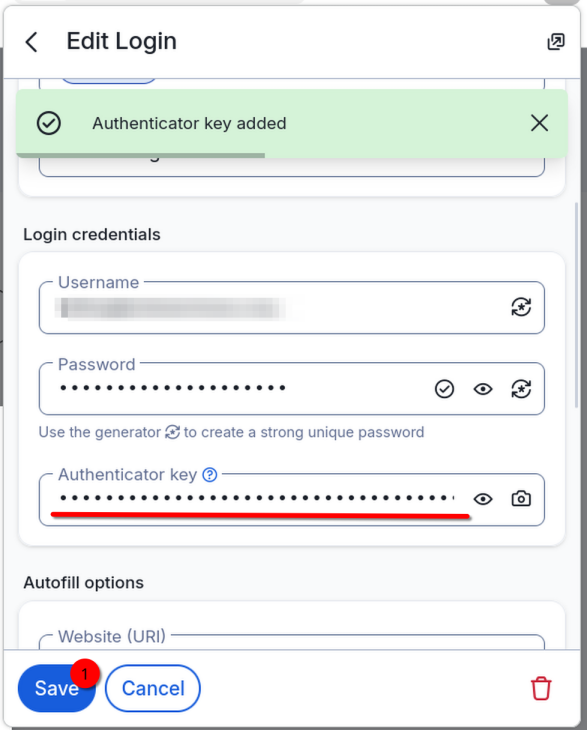
- The QR code will be scanned and the key added to Vaultwarden. Click "Save".

- Continue in the browser (usually you will click "Next"). You should be prompted to enter your 2FA code.
- Open the Bitwarden extension again and select "Fill" next to the correct account. Your 2FA code should populate in the browser page.

- You can also try simply pasting from your clipboard. When the Bitwarden extension generates a 2FA code, it automatically copies it into your clipboard.
- Select "Verify" (or whatever the appropriate option for your specific account ).
-
You have set up Vaultwarden to generate 2FA codes for your account.
Can't Login on the Bitwarden Extension
If you receive a "KDF Config is Required" error when trying to log in on the Bitwarden extension, the most likely reason for this is that you have entered the Vaultwarden URL incorrectly.
- Open the extension and scroll down to the "Accessing: self-hosted" item. Click it.

- Click "self-hosted" on the pop-up.

- Make sure you have correctly entered our Vaultwarden address/URL in the text box.
Then click "Save".https://vaultwarden.cbtscommons.org
- Try logging in again. If you still encounter errors, contact IT.